
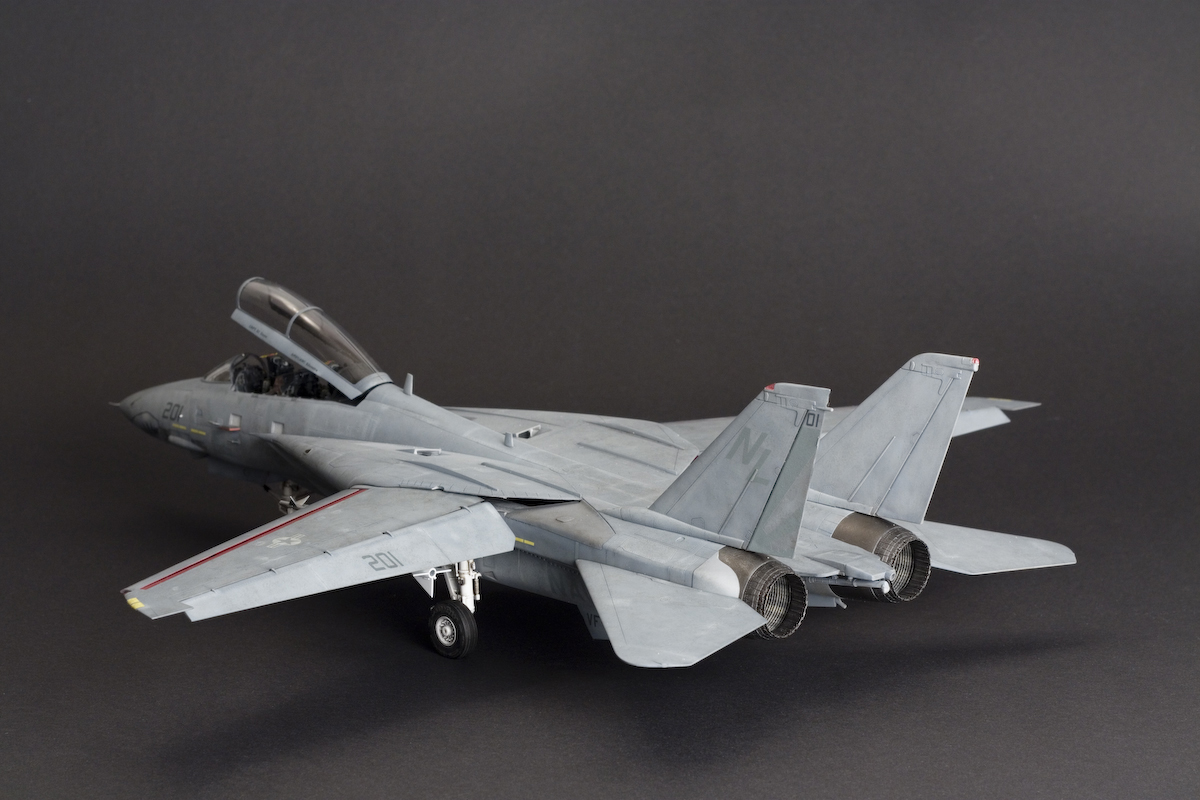
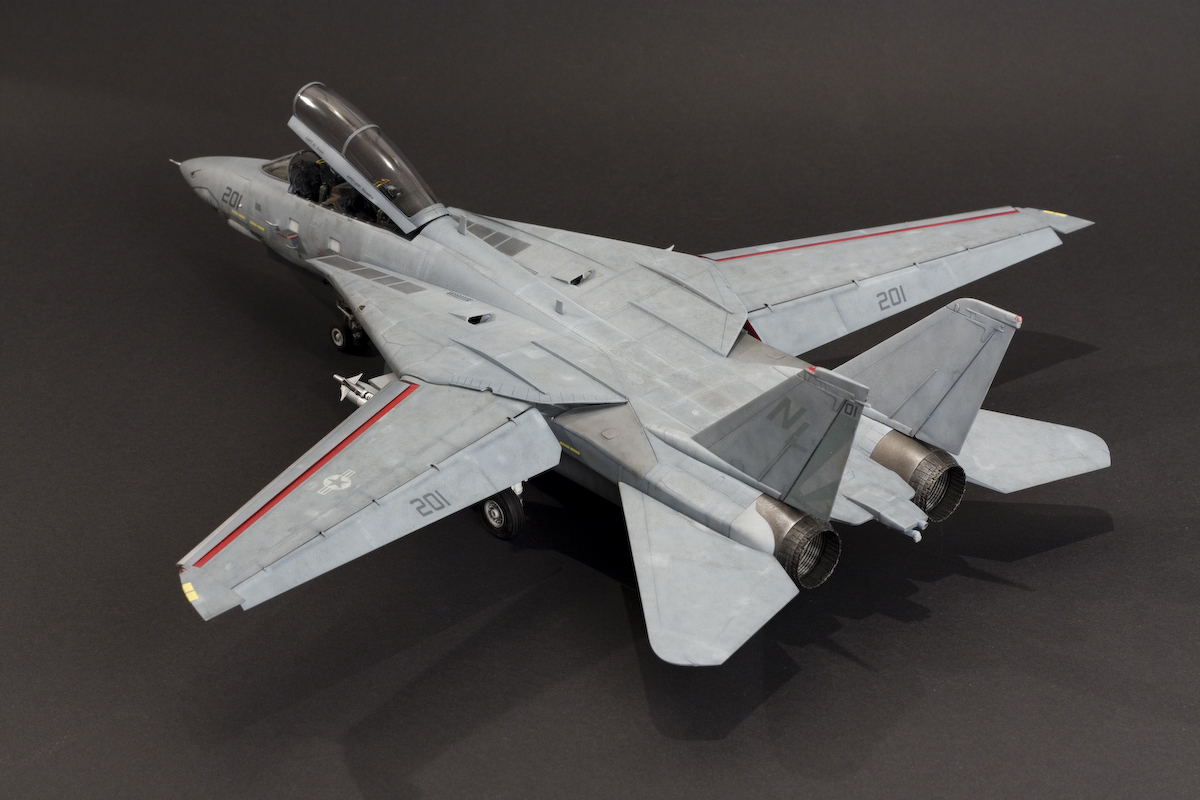
My favourite jet aircraft since my childhood, I knew it would be a long and involved build – featuring a fair share of aftermarket stuff and lots of research. Being somewhat limited when it comes to shelf space (and having a statsh that wants to be taken care of), I know that this will be my last Tomcat for quite some time. So I took my time and tried a couple of new things along the way.
The Kit
The kit itself is good. Period. I haven’t built Hasegawa’s Tomcat, not even seen an unbuilt kit in the flesh, so I cannot comment on the pros and cons of Hobby Boss’ effort. Some issues, however, should be addressed:
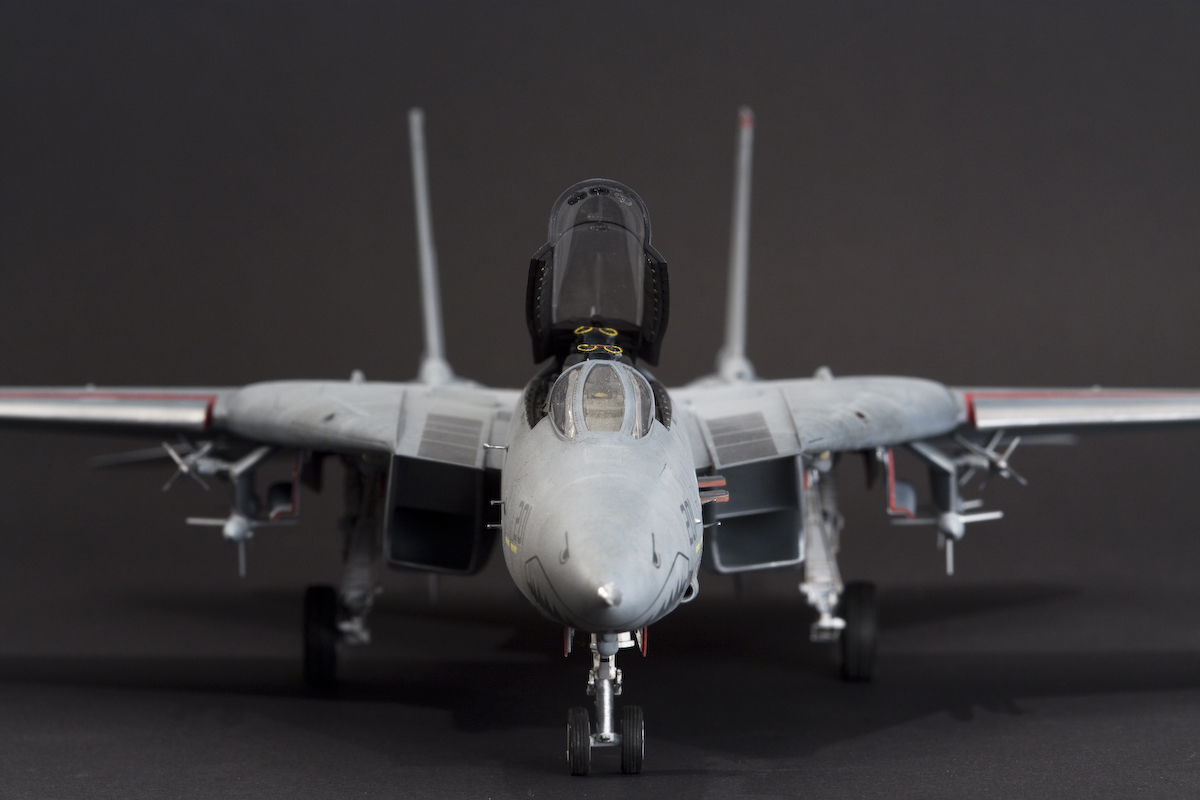
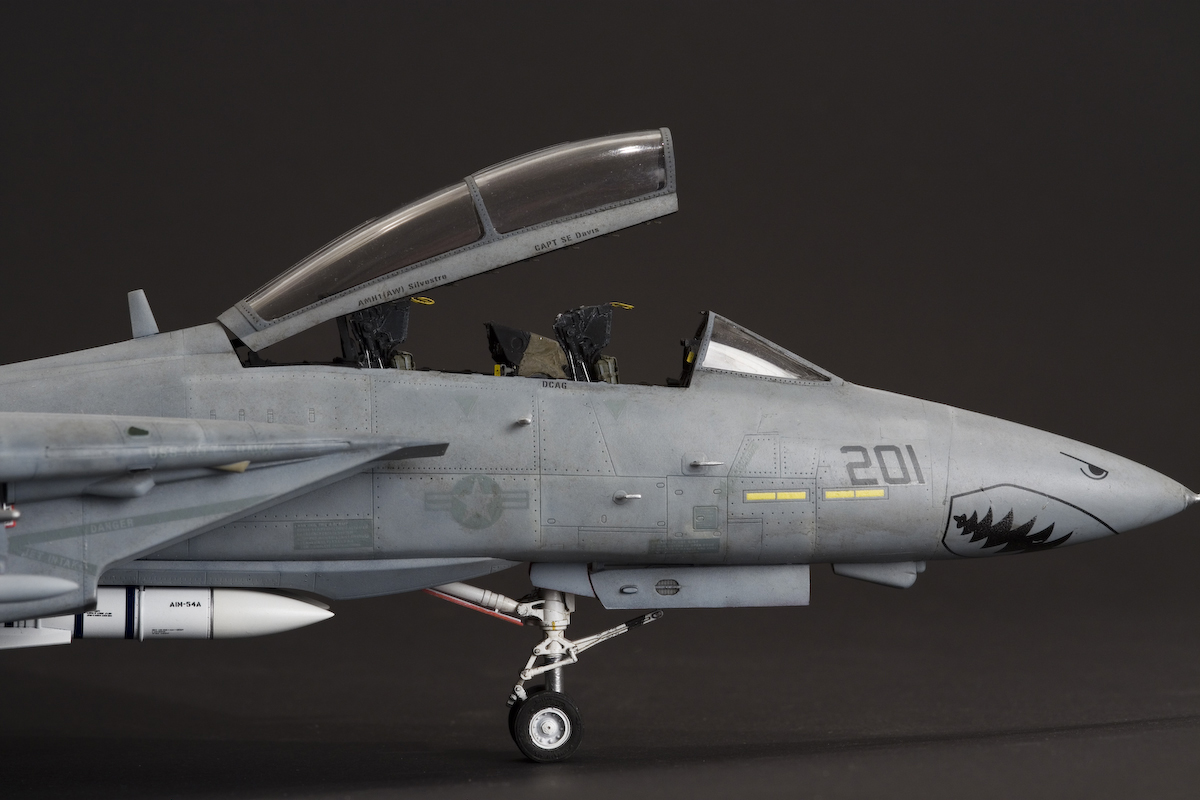
- The air intake lips should not be parallel to the ground, and they are a bit thick. This was fixed by sanding the lips at an angle, thereby introducing a slight upward cant.
- The wings and stabilizers are covered in rivets that need to be filled. Multiple coats of Squadron putty, thinned with acetone, took care of that.
- The slats, when deployed, should protrude at a slight downward angle. Easiest fix is to carefully bend their attachment rods downward a bit.
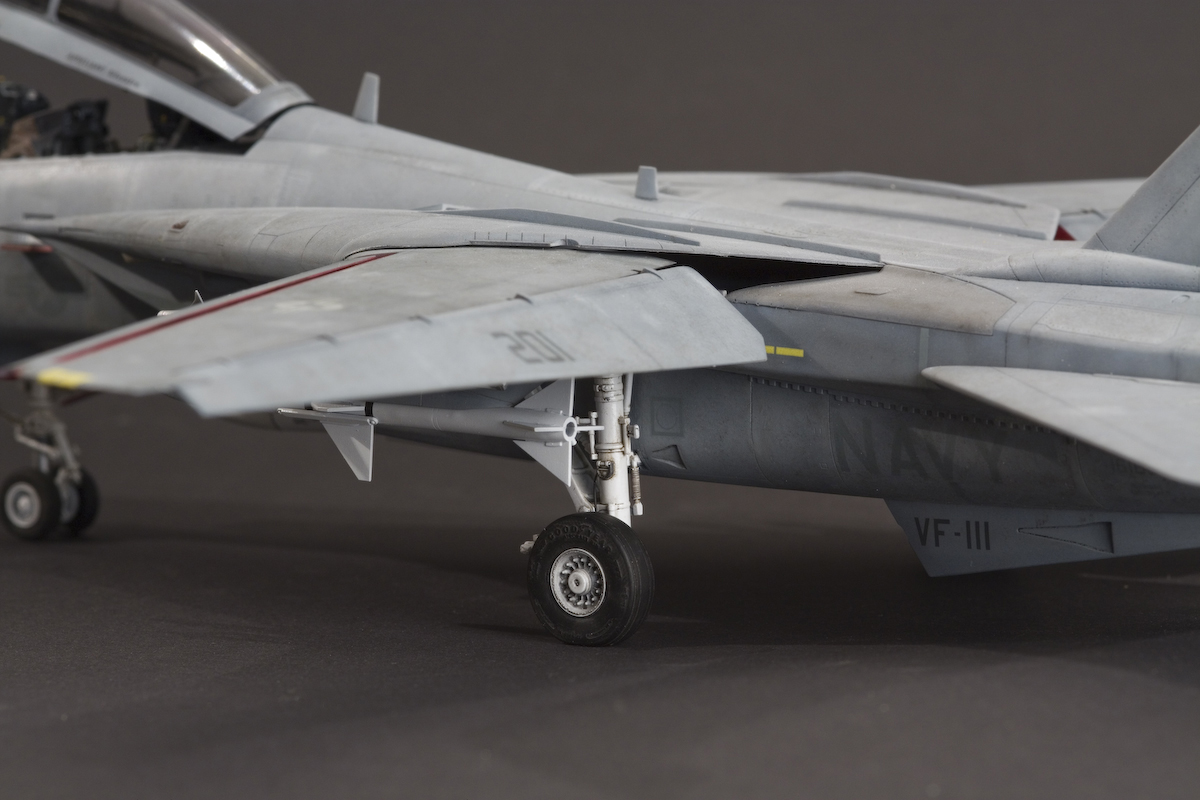
- If you want to attach the AIM-7 Sparrow missiles to the wing glove pylons, they need to be positioned farther forward. I did that by cutting off the missile fin that should go into the pylon, the missile then can be attached in its proper position.
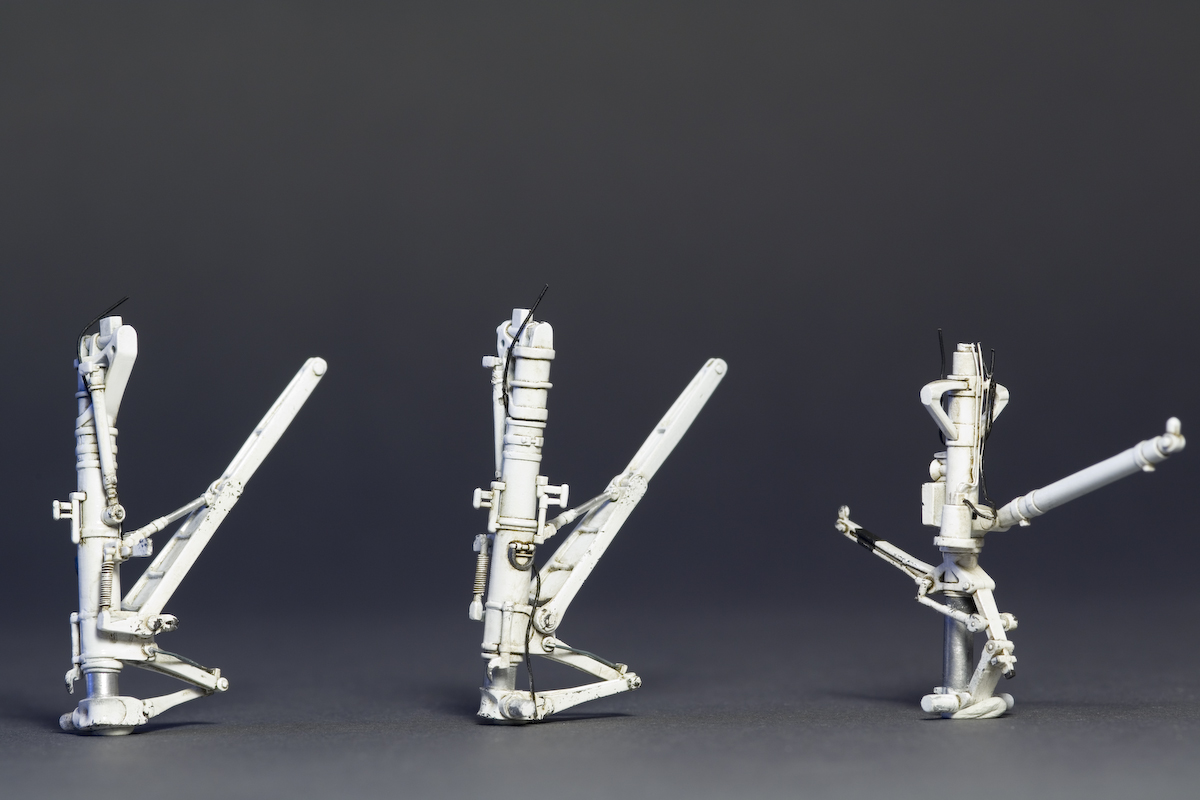
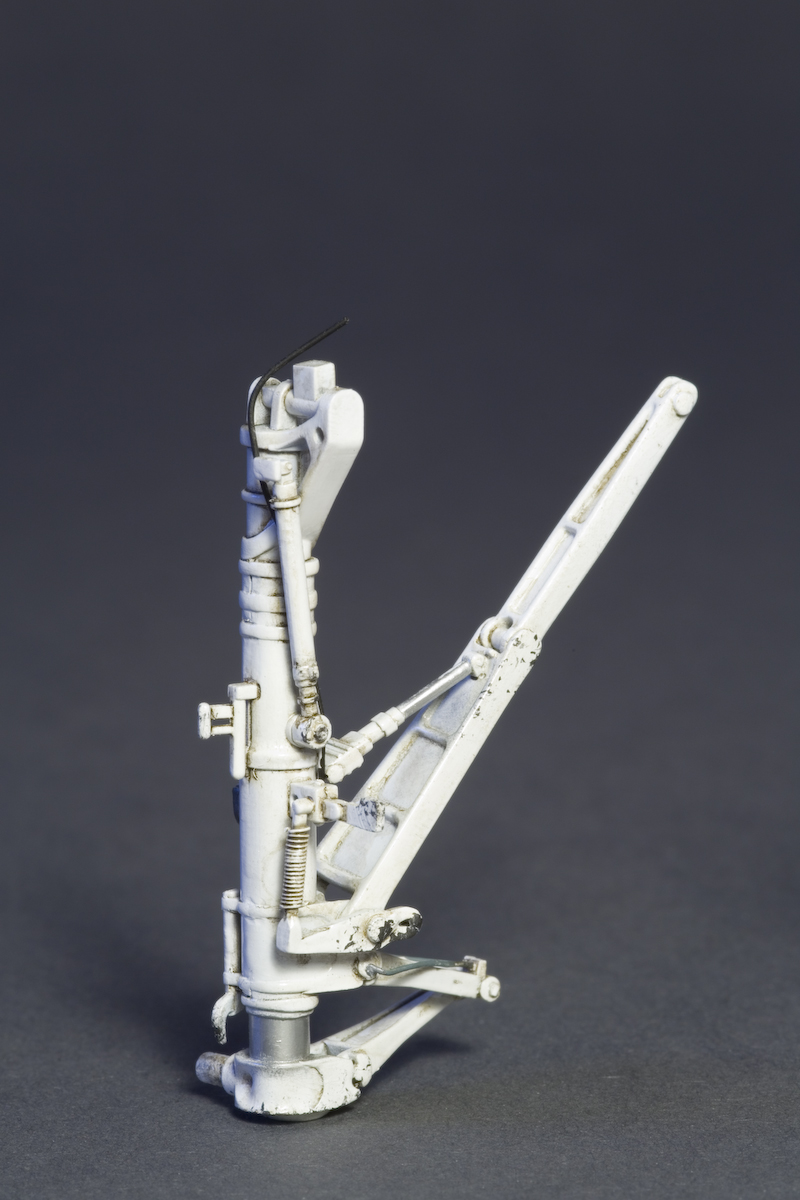
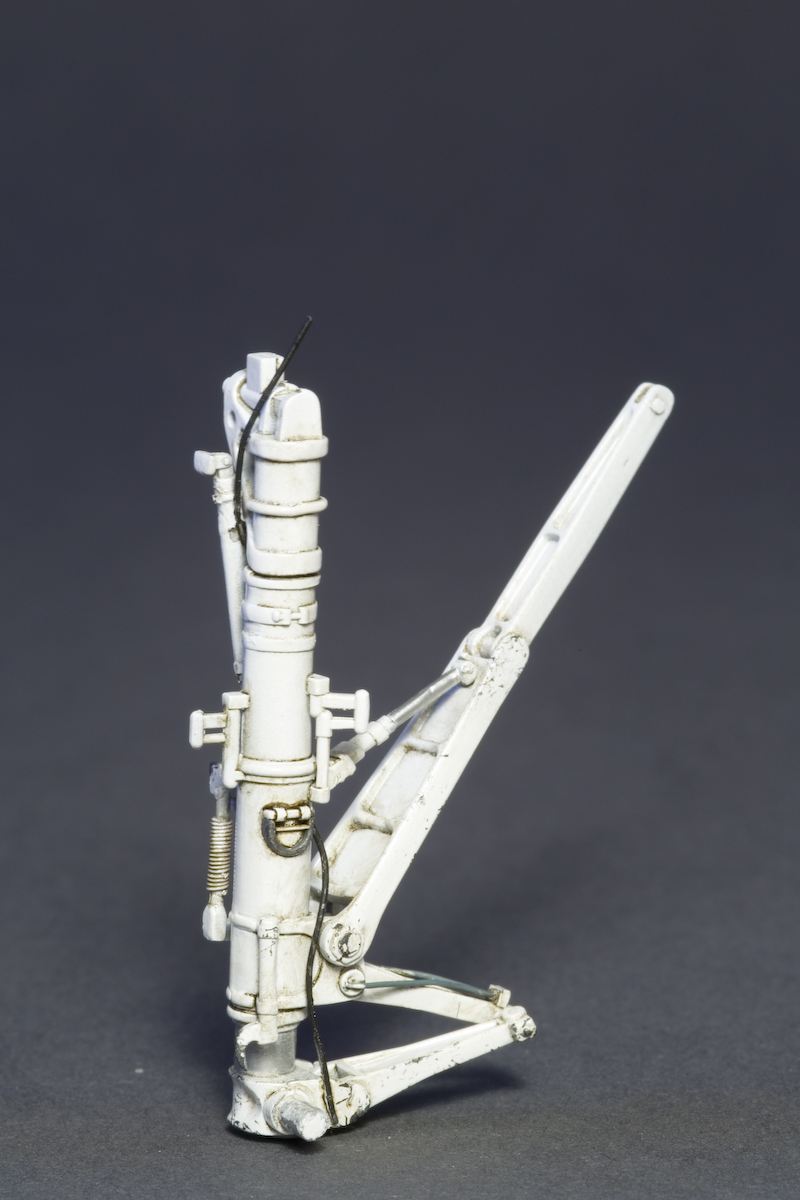
- The main landing gear struts lack some heavy springs which are quite noticable – instead, HB gives you a rather generic rod (parts F25/F26). Some thin wire, wrapped around these parts, does the trick.
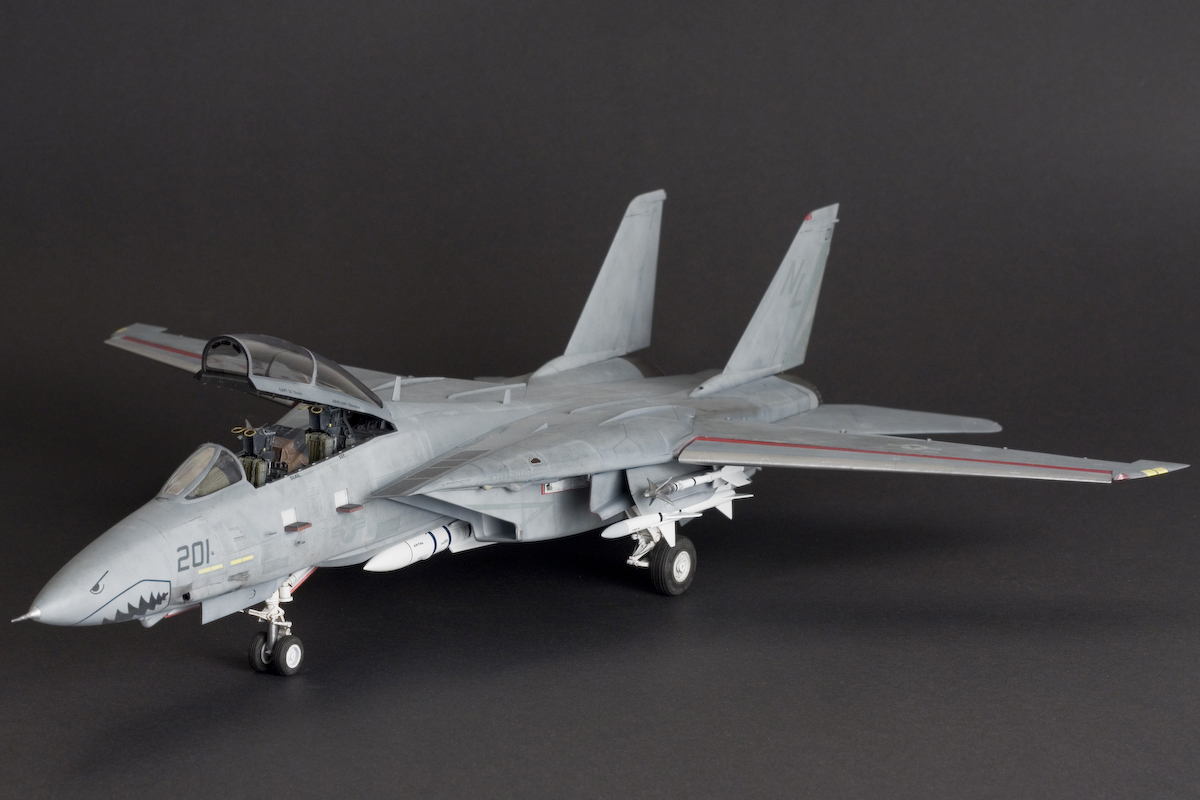
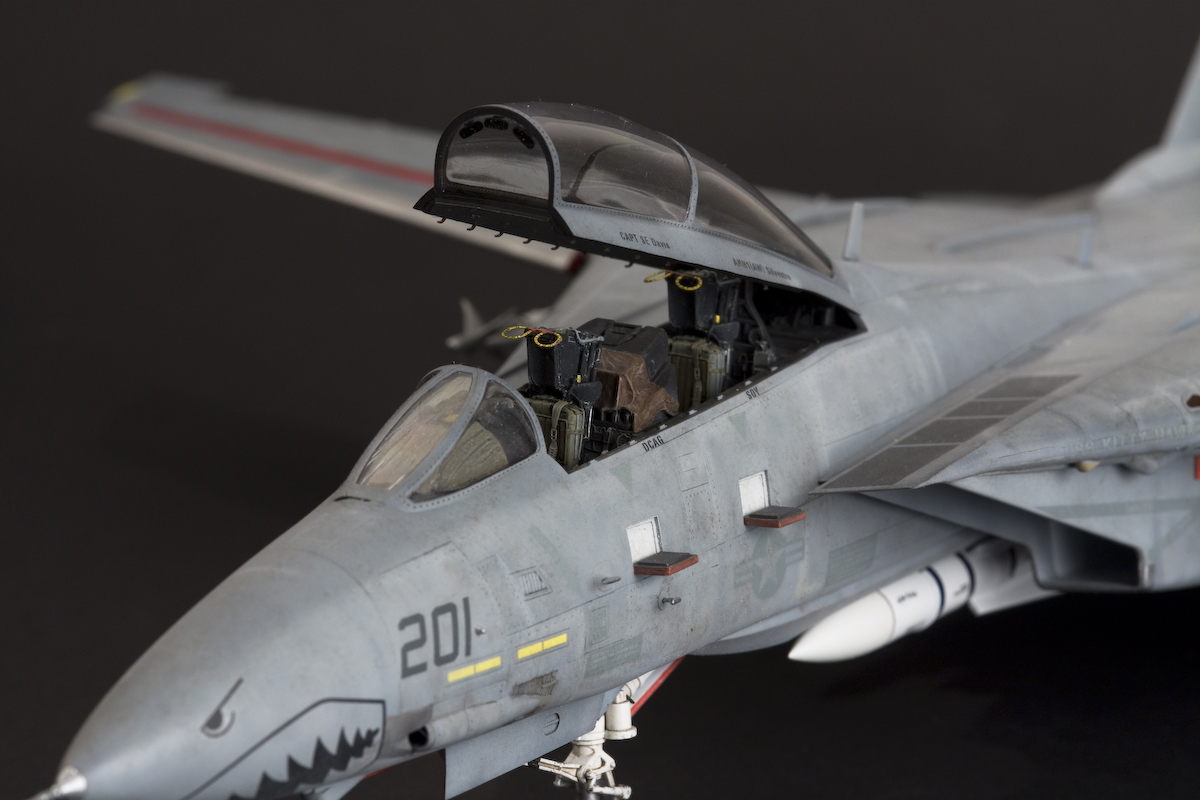
Apart from these fixes, I used an Aires cockpit set, Aires exhaust nozzles and the Wheeliant wheels set. Fitting the cockpit resulted in the usual sanding mayhem, but it’s worth it. The nozzles, on the other hand, are more or less a drop fit.
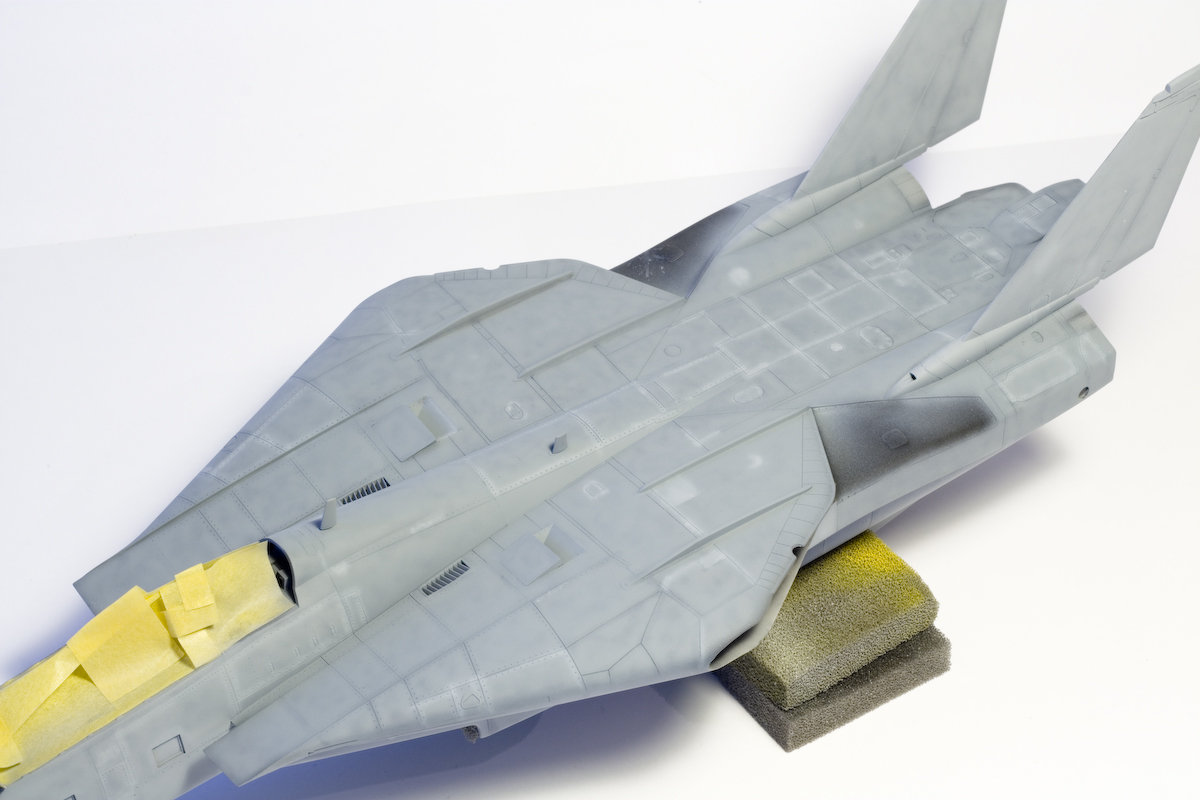
Painting
Now would be the right time for some cheap “50 Shades of Grey” joke. Maybe next time. Some time ago I mentioned I wasn’t too impressed with the Gunze Ghost Greys (H307, H308 and H337 for FS36320, 36375 and 35237). These colors seem to be too dark and have a weird purple hue to them when compared to a neutral grey card. As mentioned elsewhere, as the US Navy’s Tactical Paint Scheme doesn’t show too much contrast between paint and markings, these deviations in tone can be rather problematic when applying your decals later on.
After testing a couple of different brands I settled on the Lifecolor range – which can be very tricky to get out of your airbrush. Some experimenting later, I finally have it worked out for me. It’s either a mix of color, distilled water and Vallejo flow improver (sprays good enough), or simply Vallejo Airbrush Cleaner (sprays excellent). And keep your air pressure down!
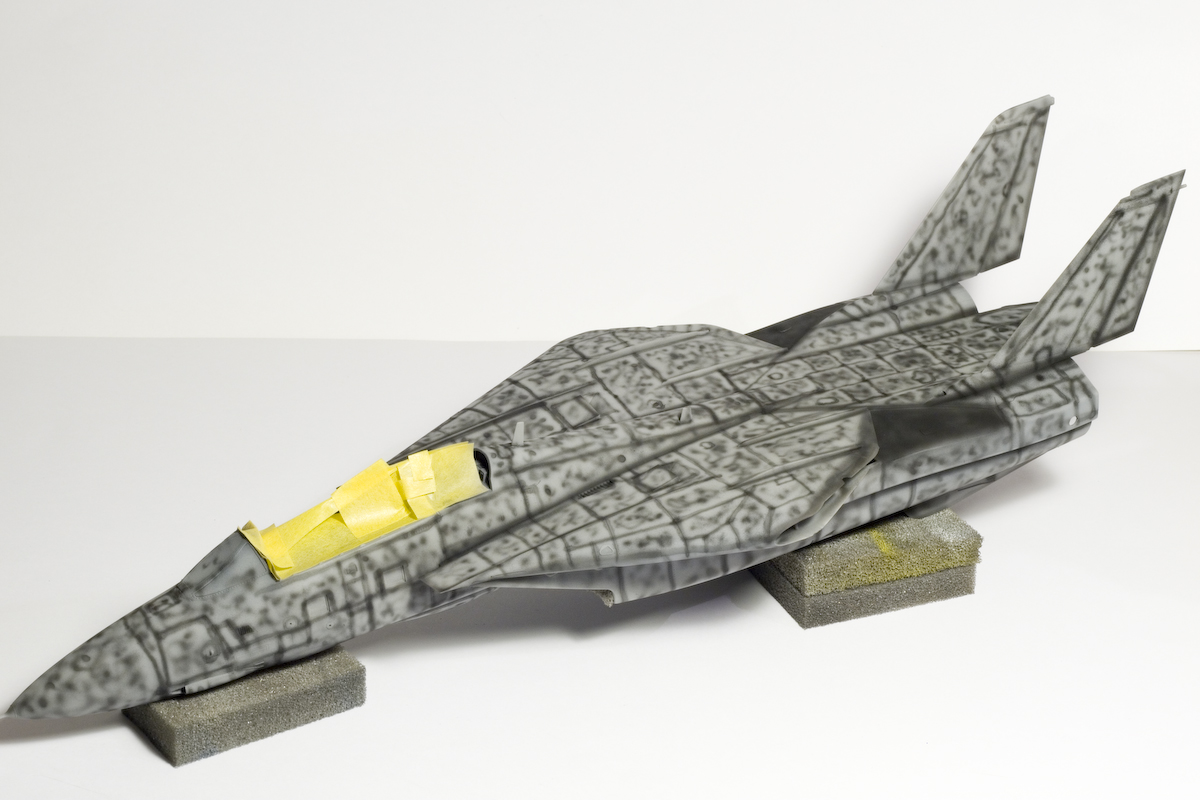
So, after a primer coat of Tamiya XF-19 and some very random preshading, the Lifecolor paints went on without a glitch.
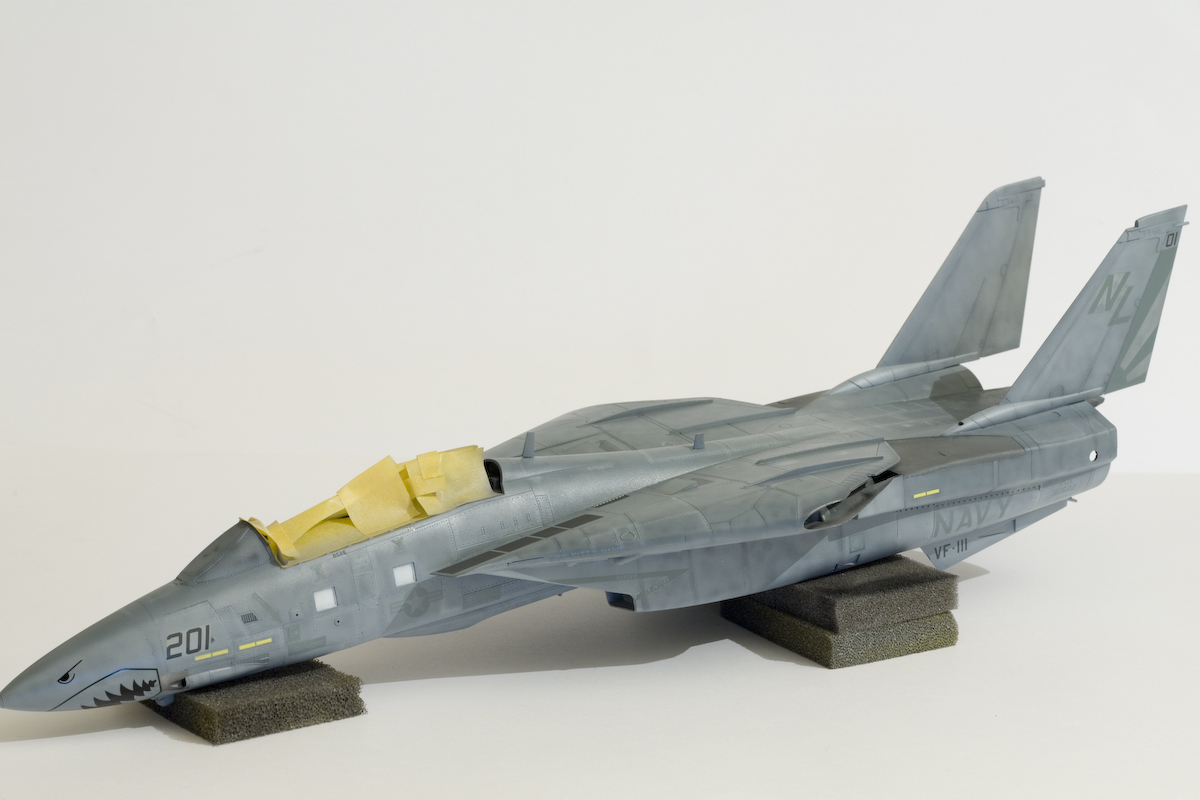
Decals
Speaking of glitches… As I wanted to depict a bird from VF-111 (“The Sundowners”), I picked up a sheet from fcm Decals. Very nice, the decals are thin, the instructions complete. so everything went well – until I applied the last two decals. The large black “Sundowners” motif for the fins would first not adhere to the surface properly, then they wouldn’t react to any setting solution, and in the end they decided to crumple up really bad and produce a general mess. No clue what caused that, my only idea would be the color used on these decals – all the grey ones behaved very well, it was only these two buggers that just wouldn’t work.
In the end, I had to use the markings for another aircraft from that sheet, which meant stripping and repainting the tail section and all the areas were the other markings specific to that plane had already been applied.
Finishing
After the usual coat of clear gloss (Tamiya X-22), I initially wanted to apply some salt weathering. I actually did start on the horizontal stabs, but then changed my mind. This method simply doesn’t cut it for me – not enough control over the final output, and too messy. Don’t get me wrong, there are some amazing models on the net that have been weathered using this technique, it’s just that I like to take my time and work slowly and deliberately. So back to my tried and tested method of oil filters and washes, various sizes of soft brushes and a couple of happy hours stippling away. By stippling the drying wash, reactivating it with small amounts of thinner, I found it easy to create that chuffed and beaten look so typical for Navy planes.
Comments
5 responses to “Done: Hobby Boss 1/48 F-14A Tomcat”
Hi, Can you give a little more of a detailed explanation of how you achieved then panelled look on the F-14. I can see the use of the black paint giving a darker hint to the main colour, but am curious as to how you have the lighter colour on some of the panel lines. Thanks
Hi Toby,
these lighter colors where achieved by post-fading the original paintwork. For that, I used the next lighter shade of grey (for example, on the upper wings and fuselage, the original FS35237 was faded with FS36320), heavily thinned and sprayed along the panel lines and rows of rivets. This was done to represent paint touch-up, usually applied to panels, screws and fasteners which are handled during routine maintenance.
After weathering with oil washes was done, I sprayed some of these areas again in their base color or a slightly lighter grey to represent very recent touch-ups.
Cheers,
Boris
Thats great. Thanks for the info.
Great work Raikisan!
I am myself building the same F-14A Hobbyboss Tomcat and was wondering with the landing gears. The instructions tell to to attach them into the “bays” before the construction is then glued to the fuselage. That would of course cause other challenges when painting the plane. How did you do it? Added the landinggears after painting done? If so, did you need to do some “surgical operations” with the landing gears ?
By the way, great tip with the springs!
Kind regards,
GrundAsk // Belgium
Thanks Karl!
Installing the landing gear at the end of the build is not a problem – you just have to be careful to not break anything, as you have to apply some gentle pressure on the struts. In fact, installing the gear at the end is the better solution anyway, because it makes it so much easier to align everything.
Cheers,
Boris